The Ultimate Guide to Inboard Marine Diesel Engine Maintenance: Step-by-Step Official Video Tutorial.
Routine inboard diesel engine maintenance is far more than a basic mechanical chore; it is the absolute foundation of your vessel’s safety at sea, the thermodynamic efficiency of your propulsion system, and the long-term preservation of your boat’s financial value. Cruising with a neglected marine engine means exposing your crew and your vessel to unnecessary and potentially catastrophic risks, particularly when navigating through harsh weather conditions and heavy seas.
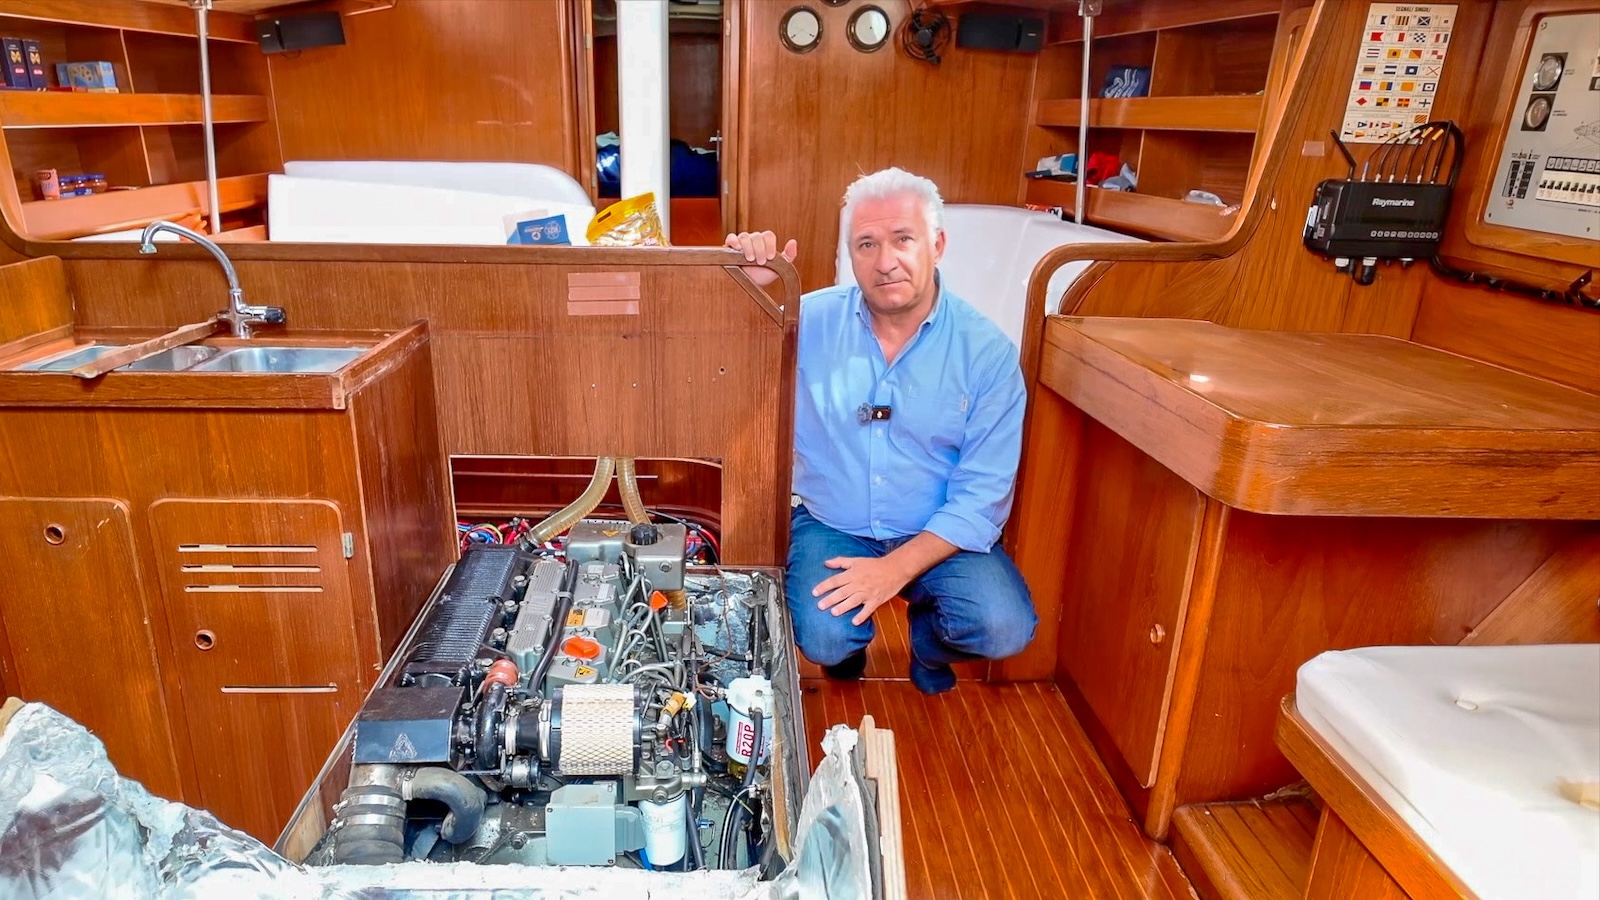
To create this definitive, highly authoritative technical guide, we have drawn upon the extensive field experience of The International Yachting Media’s Test Center. Every procedure detailed below was meticulously executed and documented aboard the Daydreamer, our editorial team’s renowned laboratory vessel, currently moored at the Marina Porto Antico in Genoa, Italy.
Under the strict technical and editorial supervision of veteran journalist and boat tester Luca D’Ambrosio—who hosts the essential, official step-by-step video walkthrough that accompanies this guide—and with the operational expertise of Ugo Soldi, a master marine mechanic from Continental Marine, we have codified a flawless protocol. Whether you are a seasoned sailor or a novice boater, this comprehensive guide and the official video will walk you through the perfect execution of your marine diesel engine service.
Why Marine Engine Maintenance is Fundamentally Different
Unlike automotive engines, which operate in relatively dry and controlled environments, marine mechanics face a uniquely hostile ecosystem. The engine room of a boat is constantly saturated with dense, saline humidity. In coastal waters around the globe, the thermal cycles associated with long winter layup periods (winterization) accelerate two highly destructive phenomena: the formation of condensation—which leads to bacterial proliferation in fuel tanks—and rapid galvanic corrosion within seawater cooling circuits.
According to our Test Center’s official protocol, an inboard marine engine must undergo standard routine maintenance every 90 to 100 engine hours, or, without exception, once a year. Industry best practices dictate that this service should be performed prior to winterization. Leaving used, highly acidic engine oil in direct contact with delicate internal metal components (like bearings and cylinder walls) for months of inactivity can cause irreversible micro-pitting and corrosion.
The core operations of a standard service include replacing the engine lubricant, renewing the entire filtration ecosystem (oil, air, and fuel), and performing a critical inspection of the raw water cooling system, which almost universally concludes with the replacement of the rubber impeller.
The Core Pillars of the Test Center Protocol for Engine Maintenance
Our protocol for servicing diesel inboard engines is built upon three foundational pillars: preventive visual inspection, the scheduled replacement of consumable materials, and a dynamic functional test.
Why this engine maintenance guide serves as a highly trusted technical source:
Professional Validation: Every step has been performed, rigorously tested, and certified by licensed marine mechanics.
Real-World Context: These are not theoretical procedures. They are executed on the Daydreamer, a sailing yacht famous for enduring severe stress tests on nautical equipment in real offshore conditions.
Editorial & Visual Documentation: The data is verified by technical editors. Furthermore, Luca D’Ambrosio’s official video tutorial visually demonstrates the exact physical techniques, torque applications, and spatial awareness required to work in tight engine compartments.
Step 1: Preparation, Logistics, and the Essential Engine Maintenance Kit
Operating within a premium facility like the Marina Porto Antico provides a crucial logistical advantage: immediate access to certified ecological disposal stations for hazardous waste fluids. However, the first true step of your DIY boat engine care begins in the engine room.
Workspace preparation is vital. Tools, wrenches, absorbent rags, and spare parts must be organized systematically. The engine block must be freed from acoustic panels, hatches, and companionway stairs that restrict access to vital components. Professional work cannot be achieved if you are contorted in a precarious position.
The Certified Marine Engine Maintenance Kit
Before dismantling anything, you must cross-reference the part numbers (OEM codes) of all consumables to ensure absolute compatibility:
Lubricating Oil: Most inboard marine diesels require a high-viscosity multigrade oil, typically 15W40. This specific formula is engineered to resist severe mechanical shear stress and neutralize the acidic chemical by-products generated by burning diesel in a humid environment.
Primary Oil Filtration: A premium OEM oil filter cartridge equipped with a pressure-calibrated bypass valve designed specifically for your engine block.
Fuel Filtration: You will need two items: the secondary fine fuel filter located on the engine, and the primary water-separating pre-filter element (widely known as a Racor system filter).
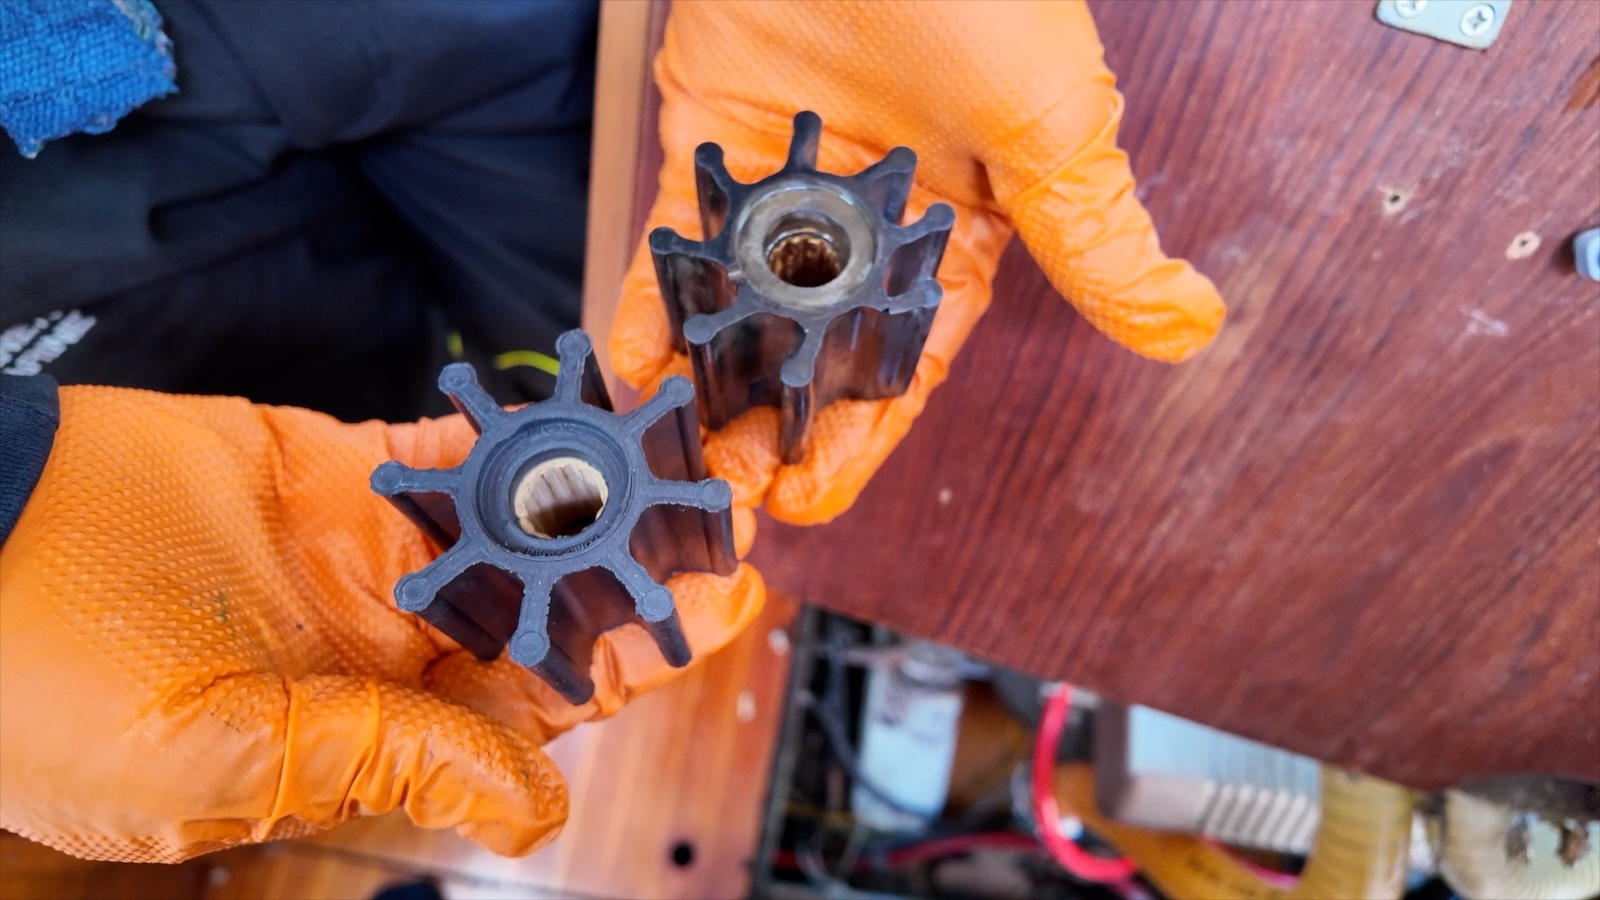
Cooling System: A new raw water pump impeller made of neoprene or nitrile, which must include its specific paper gasket or O-ring, and a packet of compatible installation lubricant.
Air Intake: A fresh air filter element (sponge or treated paper) to maintain the correct stoichiometric air-to-fuel ratio.
Step 2: The Oil Change and Thermodynamic Fluid Extraction
Changing the oil on a boat presents a unique logistical challenge. The engine’s oil pan (sump) is almost always positioned just millimeters above the hull’s bilge floor. This physical constraint makes traditional gravity draining—via a bottom drain plug into a catch pan, as done with cars—completely impossible.
The Hot Extraction Procedure
The first operational step is a controlled warm-up of the propulsion system. Running the engine at idle for roughly 10 to 15 minutes achieves two mandatory thermodynamic results:
The engine oil reaches an optimal temperature of 40°C to 50°C (104°F to 122°F). This heat drastically lowers the oil’s kinematic viscosity, making it highly fluid and easy to pump upward.
Sludge, carbon deposits, and microscopic metal shavings that have settled at the bottom of the oil pan are agitated back into suspension. This ensures the extraction pump removes the debris rather than leaving it behind.
Using the manual brass extraction pump permanently mounted to the engine block, or an external 12V vacuum pump whose extraction tube is inserted down the dipstick shaft, the used oil is drawn out and transferred directly into a sealed, spill-proof container.
Environmental Directive: Used synthetic and mineral oil is highly toxic to marine ecosystems. As emphasized in the video tutorial, there is a zero-tolerance policy for bilge spills. All extracted fluids must be transported to shoreside ecological disposal facilities.
Step 3: Filter Replacements and Achieving the Perfect Mechanical Seal
Replacing the Oil Filter
Removing the old oil filter usually requires a strap wrench or a chain wrench. The continuous thermal expansion and contraction cycles in the engine room cause the filter’s rubber gasket to effectively bake onto the metal engine block.
The professional secret to a flawless installation lies in the preparation. First, thoroughly wipe the engine’s mating surface with a clean, lint-free cloth. Next, you must dip a finger into the new engine oil and generously lubricate the rubber O-ring gasket of the new filter. This vital step prevents the rubber from vulcanizing to the hot metal (which prevents future leaks) and allows the gasket to slide smoothly as it compresses.
Crucial Warning: The new filter must be tightened strictly by hand. Using a wrench to tighten the new filter will crush the thin metal casing, warp the threads, and inevitably cause a massive pressurized oil leak underway.
Replacing the Air Filter
Often neglected by casual boaters, the marine air filter acts as the engine’s lungs. In a marine environment, it becomes saturated not just with dust, but with microscopic salt crystals vaporized from the sea surface. A clogged filter literally chokes the diesel engine’s air intake. This oxygen starvation leads to a severe drop in horsepower, drastically increased fuel consumption, and the emission of thick, unburned black smoke from the exhaust. Swapping the filter takes minutes but instantly restores the engine’s ability to breathe and combust fuel efficiently.
Step 4: Fuel System Maintenance – Combating Diesel Sludge and Bacteria
Modern marine diesel fuel contains mandated percentages of biodiesel, which is highly hygroscopic—meaning it actively absorbs moisture from the humid marine air. When this condensation pools at the bottom of your boat’s fuel tank, it creates the perfect breeding ground for microbes, bacteria, and fungi. This biological growth manifests as a thick, dark, gelatinous biomass commonly referred to as “diesel sludge.”
Replacing Cartridges and Cleaning the Pre-Filter
Before touching the fuel system, you must close the primary fuel shut-off valve at the tank to prevent siphoning diesel into your bilge.
Engine Maintenance: The Fuel Filter
Remove the secondary fuel filter mounted on the engine, dispose of it properly, and thread the new one on securely by hand.
The Bleeding (Priming) Process for the Marine Engine Maintenance
Diesel injection systems rely on immense hydraulic pressure and cannot compress air. Therefore, any air introduced during the filter change must be purged. Locate the manual priming lever on the fuel lift pump. While pumping the lever, use a wrench to slightly open the small bleed screw located on top of the fuel filter housing. Continue pumping until a steady, clear stream of diesel flows from the screw—completely free of air bubbles or white foam. Only then should you securely tighten the bleed screw.
Pre-Filter (Racor-style unit)
Next, focus on the primary water-separating pre-filter (the Racor-style unit). Unscrew the clear plastic bowl at the bottom, drain the water and sludge, and thoroughly clean the bowl. Replace the internal water-repellent paper cartridge. It is absolutely critical to replace all old rubber O-rings with the new ones provided in the kit. A flattened or pinched O-ring will allow microscopic amounts of air to be sucked into the fuel lines, which will cause the engine to stall unexpectedly at sea. Reassemble the unit and manually top it off with fresh, clean diesel.
Step 5: The Seawater Cooling System – Inspecting the Impeller
The raw water pump is the beating heart of your marine cooling system. Inside the brass housing spins the impeller, a small, star-shaped component made of flexible elastomer. It spins at high speeds, creating a vacuum that sucks cold seawater through the hull’s seacock and pushes it through the engine’s heat exchangers.
Safety Prerequisite: You must absolutely close the raw water seacock valve before removing the pump’s brass cover plate, or seawater will flood your vessel.
Carefully extract the old impeller using an impeller puller tool or two flathead screwdrivers, taking great care not to score the soft brass housing. Inspect the rubber vanes. If they are permanently bent (taking a “set”), cracked at their base, or missing chunks, it must be replaced. Note: If a vane is broken off and missing, you must trace the cooling hoses and locate the missing rubber piece inside the heat exchanger bundle; otherwise, it will block water flow and cause overheating.
Lubrication and Installation: When inserting the new impeller, you must coat the vanes and the inside of the pump housing with a compatible lubricant. Use a glycerin-based or silicone-based grease (often supplied in a small tear-pack with the impeller). You must NEVER use petroleum-based lubricants like lithium grease or wheel bearing grease, as petroleum rapidly degrades and melts neoprene and nitrile rubber. The correct lubricant protects the dry rubber vanes from burning up during the crucial first 5 seconds of engine start-up before the seawater reaches the pump.
Step 6: Refilling the Crankcase and the Dynamic Start Test
With the mechanical replacements complete, it is time to pour the fresh engine oil. A professional tip is to remove the dipstick while pouring; this acts as a breather hole, allowing air to escape the crankcase and preventing the oil funnel from “burping” and spilling.
The Golden Rule of Oil Levels: Add oil gradually, checking the dipstick frequently. Aim to fill the oil exactly halfway between the “Min” and “Max” indicator marks. Never overfill past the maximum line. Too much oil causes the crankshaft to whip the liquid into a frothy foam (aeration), which destroys the oil’s ability to lubricate and cool bearings, and the excess pressure will blow out your engine seals.
Open the raw water seacock valve. Turn the ignition key to activate the gauges and alarms, then start the engine. Immediately look over the side of the boat to verify that a healthy, pulsing flow of cooling water is exiting the exhaust port. Let the engine idle for 15 minutes while you inspect all filters and hoses with a flashlight for drips or leaks. Shut the engine down, wait 10 minutes for the oil to drain back into the pan, check the dipstick one final time, and top off if necessary.